
Generally, the process begins by molding a fresh concrete sample and allowing the sample to cure in standardized conditions. Testing takes place at a pre-specified time, usually 28 days after molding, with all procedures performed following ASTM standards. It’s done with two or three cylinders formed from the same concrete sample. Although testing is sometimes done on cylinders after seven days for an early indication of potential strength, the results shouldn’t be used for concrete acceptance.
How Common Are Low Strength Results?
When the mixtures are appropriately proportioned to meet the standard requirements — as outlined in the ACI Building Code ACI 318, and the Standard Specifications for Structural Concrete ACI 301 — low strength results only happen one to two times in 100 tests because of normal variability.
If the specified strength is less than 5,000 psi, it’s considered acceptable and compliant if:
- No individual test result is lower than the given strength by more than 500 psi; and
- The average of three consecutive tests is equal to or exceeds the given strength.
What Causes Low Compressive Strength Of Concrete?
Production Error
Low strength concrete is frequently linked to an error during production, such as adding too much water to offset placement delays or because of a customer request for wet concrete. Another common error is too much air content for the design mix.
Improper Cylinder Handling
This also includes curing and testing any cylinder and generally causes most low strength results.
What Can I Do About Low Test Results?
Most of all, gather all test results and examine the data. Look for patterns in the results and ask these two questions:
- Is compliance violated by the sequence with the specification?
- Are clues provided in the data as to the cause?
Keep in mind the strength range for two to three cylinders, taken from the same sample, shouldn’t surpass 8 percent or 9.5 percent. If deviations are present, examine:
- The slump;
- Air content;
- Ambient and concrete temperatures;
- How many days the cylinders were left in the field;
- Procedures used for initial field and lab curing; and
- If any cylinder defects were reported.
Tips For Inspecting Defective Cylinders
Verify Testing Accuracy
After verifying the accuracy, compare the measured strength to structural requirements. Examining the in-place strength isn’t needed if there’s deficient testing or a greater than necessary strength is present. Yet, consider further investigation if the procedures correspond with the standards and strength specified as a requirement of the section.
Confirm Testing Procedures With ASTM Standards
Although minor defects which develop during cylinder curing under moderate weather conditions generally don’t affect the overall strength, major defects may. This includes nearly every handling and testing defect along with a combination of factors, such as:
- Frozen cylinders;
- Incorrect caps;
- Improperly finished surfaces;
- Extra days in the field;
- Any impact during transportation;
- Delayed curing once in the lab;
- Insufficient care in breaking the cylinders; and
- Initial curing performing in temperatures more than 80 degrees Fahrenheit.
Expect Lab Accountability For Procedure Issues
It’s crucial to expect accountability from the lab if their procedures ultimately cause defects and/or issues. The lab should have certified field-testing technicians and employees — any employee or worker not trained in concrete testing should not be allowed to make and/or handle the cylinders.
Before choosing a laboratory, make sure the lab is:
- Able to meet or exceed ASTM C 1077 standards for testing concrete and aggregates;
- Has been examined by the Cement and Concrete Reference Laboratory (CCRL) laboratory inspection or a comparable program;
- Field testing employees have current ACI Grade I Field Testing Technician certification or equivalency; and
- Lab employees have the ACI Grade I and II Laboratory Testing Technician and/or ACI Strength Testing Certification or an equivalency.
How To Create Standard Cylinder Tests
First Steps
- Take concrete samples as it falls from the chute in two separate parts during the middle portion of the pour.
- Take the sample to the curing location for the first day and remix it for homogeneity. Make sure any molds used to conform to the required standards for the sample.
- Use a standard rod or vibrator to consolidate the concrete in two to three equal layers. Tap the mold sides to close any rod holes.
- Smooth and level the tops, allowing for thin caps. Move the cylinders right away after molding and support the bottom.
Second Steps
- When cylinders undergo initial curing at the job site during the first 24 hours to 48 hours, store them in a moist environment with temperatures between 60 degrees and 80 degrees Fahrenheit. Immerse the molded cylinders in water within this temperature range, if possible. If curing boxes don’t have temperature controls, overheating is possible which will cause lower strengths.
- Keep the cylinders out of direct sunlight and protected from moisture loss if stored in an exposed environment.
- Handle the one-day-old cylinders gently during transportation to the laboratory.
- Once at the laboratory, demold the cylinders, transfer all identifying marks, and quickly place in a moist curing environment at 73 degrees Fahrenheit, plus or minus three degrees.
- All curing in the laboratory should follow ASTM C 31 standards and by maintaining water on the cylinder surfaces during the duration.
- Determine and record the cylinder mass. This information is frequently crucial in determining low strength problems.
Applying Cylinder Caps
- All caps must be flat with an average thickness less than a ¼ inch with less than 1/8 inch preferable. The smaller thickness is essential when testing concrete strength greater than 7,000 psi.
- A minimum 5,000 psi capping material and limit the use of a sulfur capping compound.
- Give the sulfur caps a minimum of two hours to harden. Generally, when these caps can age for one to two days, the result is a higher strength — a crucial part when testing strengths exceeding 5,000 psi.
- If neoprene pad caps using, make sure:
- An appropriate Durometer hardness is used for the strength level being tested;
- The pad caps are qualified for use; and
- The pads aren’t worn nor exceed the allowed number of reuses.
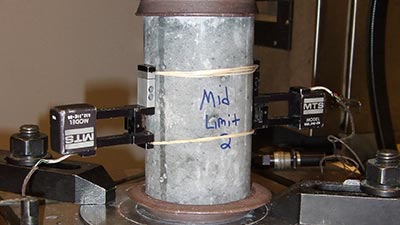
Testing Concrete Cylinder Breaks
- Make sure the testing machine has been adequately calibrated, measure the cylinder diameter, and check the cap planeness.
- Center the cylinder on the machine and use a proper loading rate.
- Break the cylinder to complete failure.
Thoroughly examine the failure pattern. Vertical cracks through the cap or chipping off the side demonstrate improper load distribution.